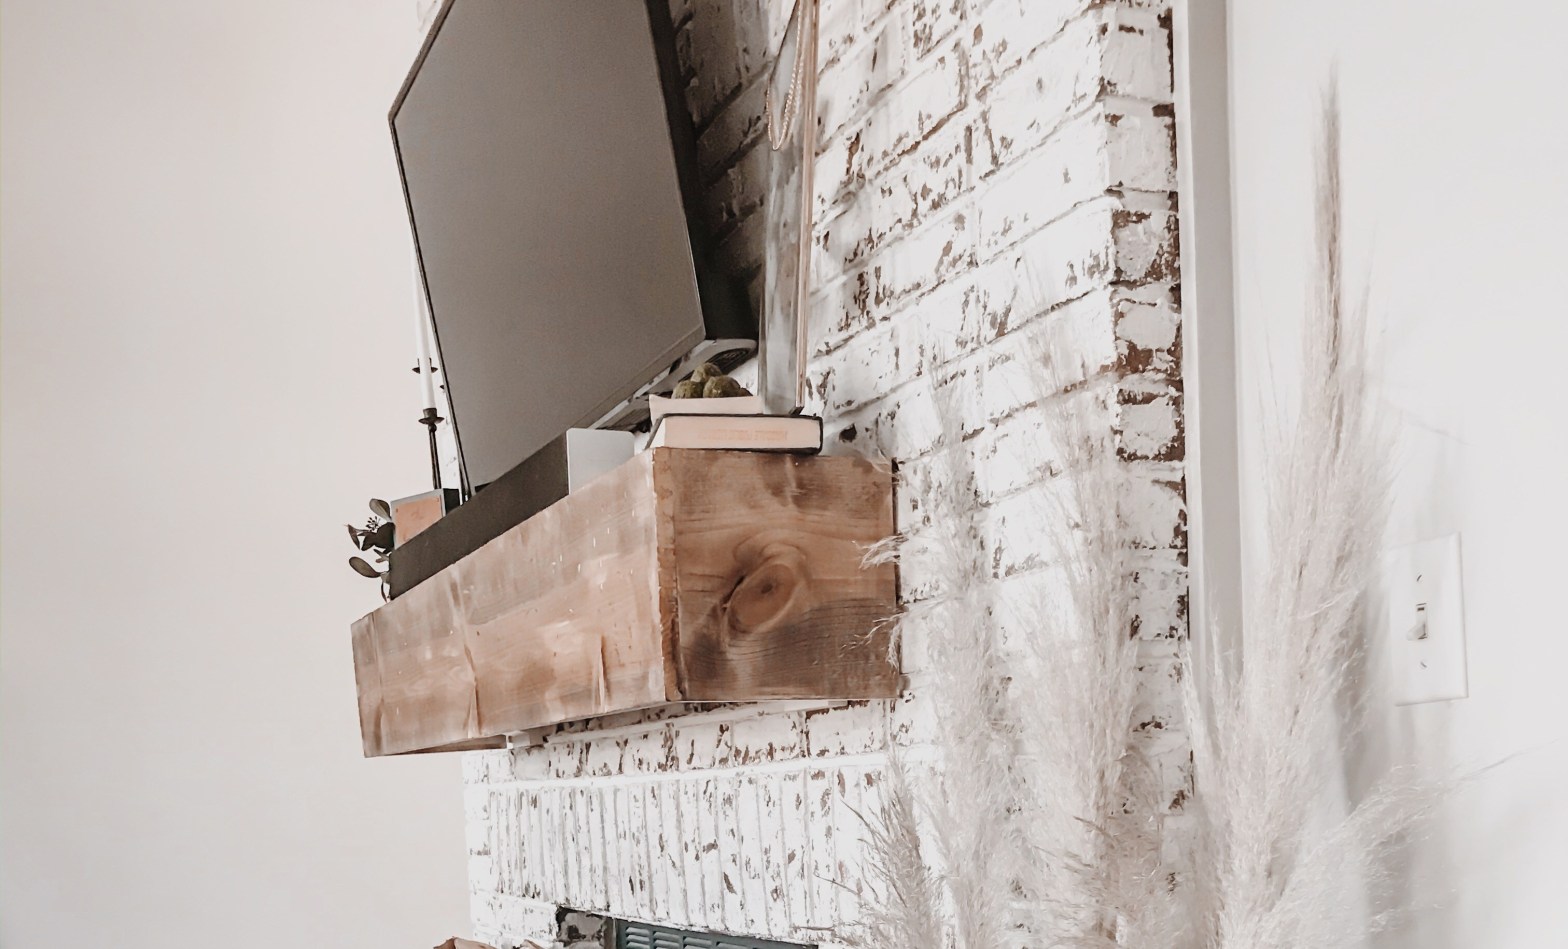
Hi, friends! Long time, no see! Hopping back on to share my latest diy...I say "my" latest, but this one was all T Giles! Thankful for my guy who has been so interested in being a handy-man lately. Here's a quick snapshot of how the mantle looked before we touched it: Check out how weContinue reading "DIY Custom Wood Mantle + Mounting a TV to Brick"
FIVE FAV IKEA HACKS

More IKEA, you ask? Yeahhh!! We have found so many super fun pieces at IKEA, which (for the most part) we use for things other than their original purpose. How fun, right?! I'm sharing five of my top favorites below! Shop for yourself by click the number beside each description 🙂 ****** #1 IKEA photo framesContinue reading "FIVE FAV IKEA HACKS"
DIY WALL MOUNTED EASEL: IKEA HACK
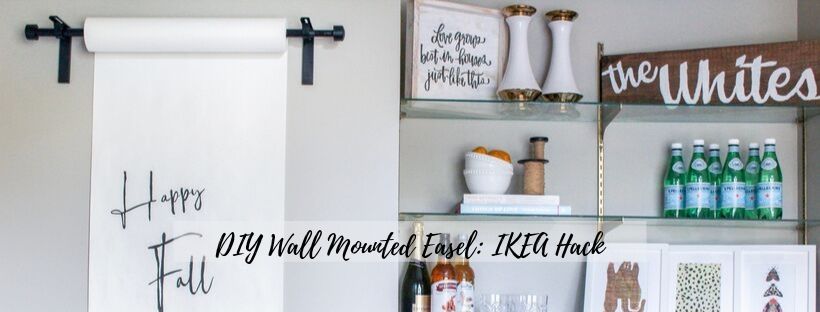
Hi, pals 🙂 It's been so long since I've attempted any diy project, so this simple + easy one was a no-brainer. I have wanted to find something to fill the space on a wall in our dining room, but knew I didn't want regular wall art. A few months ago, I saw the perfectContinue reading "DIY WALL MOUNTED EASEL: IKEA HACK"
DIY: Donut Wall

I had to chance to help celebrate my best girl this weekend, as her wedding is almost less than a month away! It sure has flown by! T + I are so excited to get our people married on March 16th! Part of my job for her bridal brunch was to mail out invitations +Continue reading "DIY: Donut Wall"
DIY: Special Date Christmas Ornament
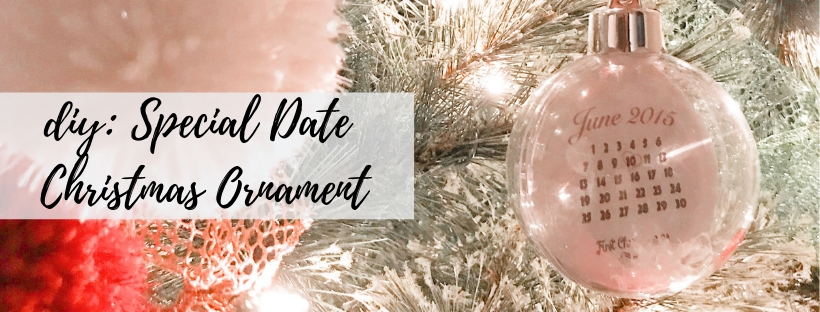
It's here: my the first Christmas related DIY! *heart eyes* I am so excited to share this with you guys. This one is so special to me, since it was my first Christmas ornament gift to my sweet T. It marked our official "dating" date, June 10, 2015, which is when we exclusively declared ourselvesContinue reading "DIY: Special Date Christmas Ornament"
DIY: Candy Corn Halloween Decoration

Halloween is in 10 days, say whaaat?! I feel like it should still be March. T + I were chatting with a friend yesterday + we both can't even believe our wedding happened this year. Time, please slow down! Y'all know my love for DIYs + I'm bringing you another one this week! **if youContinue reading "DIY: Candy Corn Halloween Decoration"
DIY: Transform Brick With German Smear
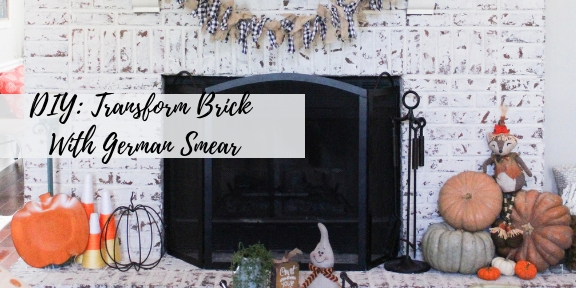
WOW, I can't believe I'm finally getting to share this project with y'all! This was our first #homeimprovement project + let me tell ya--want to test your marriage? Do a DIY project together hahaha! Really though, T helped out SO much with this. I'm just the type of gal who is up for ANY DIYContinue reading "DIY: Transform Brick With German Smear"
