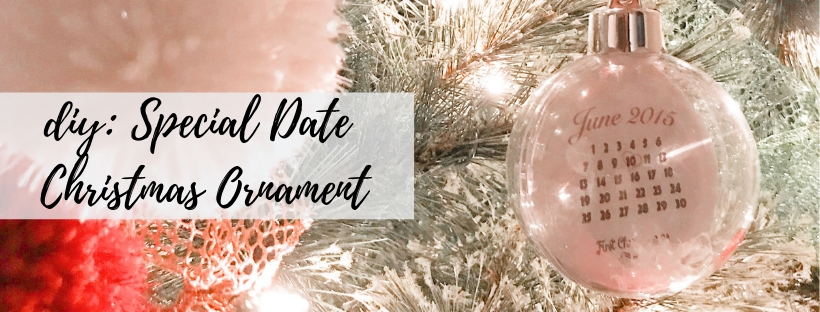
It’s here: my the first Christmas related DIY! *heart eyes* I am so excited to share this with you guys. This one is so special to me, since it was my first Christmas ornament gift to my sweet T. It marked our official “dating” date, June 10, 2015, which is when we exclusively declared ourselves “a pair”. *more heart eyes*

This DIY project, like the others I’ve posted, is SO very easy. Less than 5 steps! We all have special dates: first dates, official relationship anniversaries, wedding anniversary, babies’ birth-dates, etc. Follow along below + learn how to create your own special date ornament!
_______
Step 1: Supplies
For this project you will need: A Clear Fillable Ornament, White Card Stock, Fake Snow Pieces, Red Velvet Ribbon, and a laptop with Microsoft Word
Step 2: Create a Calendar + Print
Okay, so this is the hardest part. If you know how to work Microsoft Word, however, you should be fine. Open Word + open a calendar template. Choose your special date’s year and month, and the rest of the dates should fill in. Decrease the size of the calendar to approximately the diameter of the center of clear ornament. *I’ve included an example below* *this might take a few prints–it usually takes me three to perfect!* When perfect, print, cut out, and place in the center of the ornament.

Step 3: Add Fake Snow + Close
Once you have the paper in place, drop a few pieces of fake snow on each side of the card-stock. Close the ornament, making sure to hear the clicking sound of it closing shut.
Step 4: Add Ribbon + Hang
Instead of the regular ornament metal hanging piece, I recommend adding red velvet ribbon to hang the piece by. I feel like it gives it that last bit of Christmas flare. When the ribbon is tied, hang on your tree or wrap it up as a gift to your loved one!
____

