
Halloween is in 10 days, say whaaat?! I feel like it should still be March. T + I were chatting with a friend yesterday + we both can’t even believe our wedding happened this year. Time, please slow down!
Y’all know my love for DIYs + I’m bringing you another one this week! **if you missed my German Smear Brick Fireplace post, head on over to check it out! I made sure to include tons of pics!** I absolutely love decorating my space for the holidays. Sometimes the cutest decorations are SO expensive + I know good+well I could make them myself at home, for half the price. This is what inspired this week’s DIY, Candy Corn Halloween Decorations!! This project has a total of TWO steps + is so easy–check it out below!
___________

Supplies:
You’ll need–styrofoam cones, orange, yellow, and white yarn, and fabric glue, and a paint brush.
You can click on each link above to see which supplies I used, all from the one+only, Hobby Lobby!
Step 1: Brush on the Glue
Brush on the glue by dipping your brush into a bowl full of the fabric glue. A little goes a looong way!
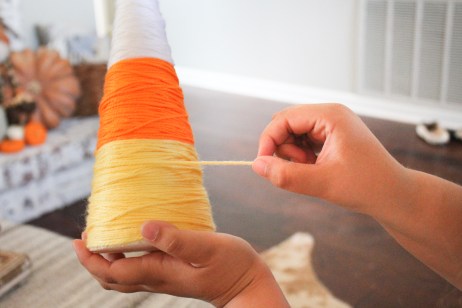
Step 2: Wrap the Yarn
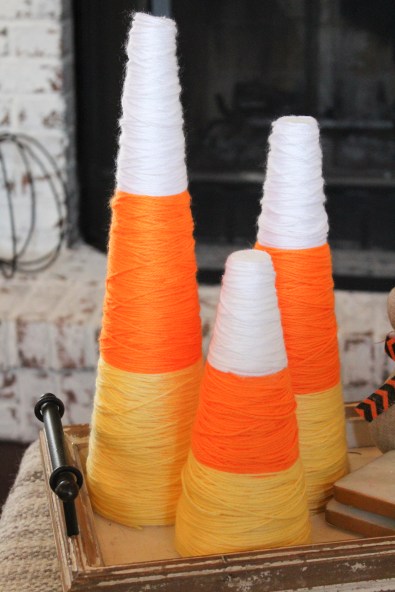
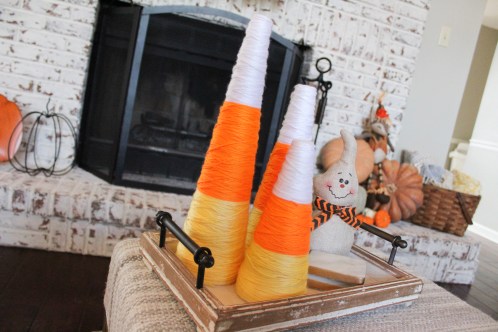
This is the tedious part. Start at the bottom with yellow yarn. Wrap+wrap+wrap until 1/3 of the cone is covered. Move on to the orange yarn, and end with the white. I recommend covering twice. When you’ve finished each section, tuck the end of the yarn into the bottom layer.


___________
That’s all, folks! Place your diy candy corn pieces on a centerpiece, or even set then on a hay bale on your porch! These guys will never go out of style + will last for years!

Have a DIY project you want to see?? Send suggestions my way!


